Prompt Seedream for splitting an image into layers
Last updated: November 16, 2026
Get editable layers out of a flat image with Seedream, in one run or one element at a time, for UI, key art, characters, props and effects.
Try Seedream 5.5 Layerize in Layer
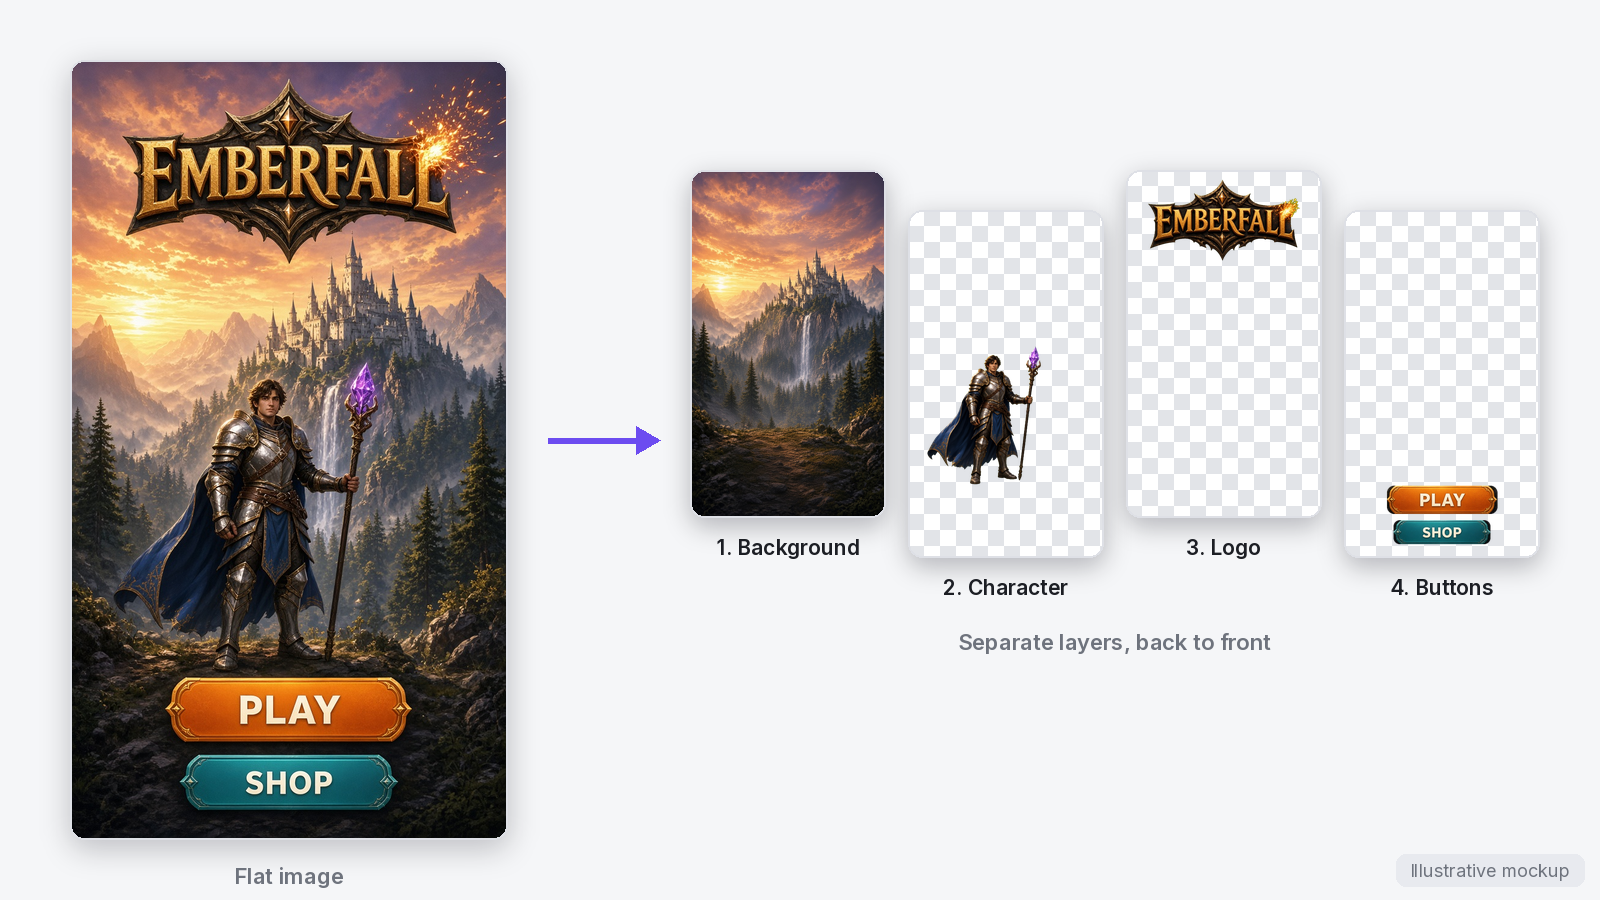
One flat menu screen, split into a background, a character, a logo and a buttons layer. Illustrative mockup.
Let the agent write it
You don't have to write these prompts yourself. The Layer agent knows how to prompt Seedream from the same guidance this page is built on. Attach the image in chat, name the model and list the layers you need, for example: Split this main menu screen into layers with Seedream: logo, each button, the character art and a clean background. The agent picks the method, shows you its plan, and runs it when you approve. See Write a brief for the agent.
When to use it
Any flat image you need to take apart: a UI or live-ops screen you will reskin or localize, key art you will refit to other formats, a character you will cut for animation, props you want as separate sprites, an environment you will turn into parallax planes, or an effect you want to composite on its own. It works across genres and art styles, from painted fantasy to flat vector UI.
For a background split into depth planes for scrolling, see Split a background into parallax layers.
Two ways to get layers
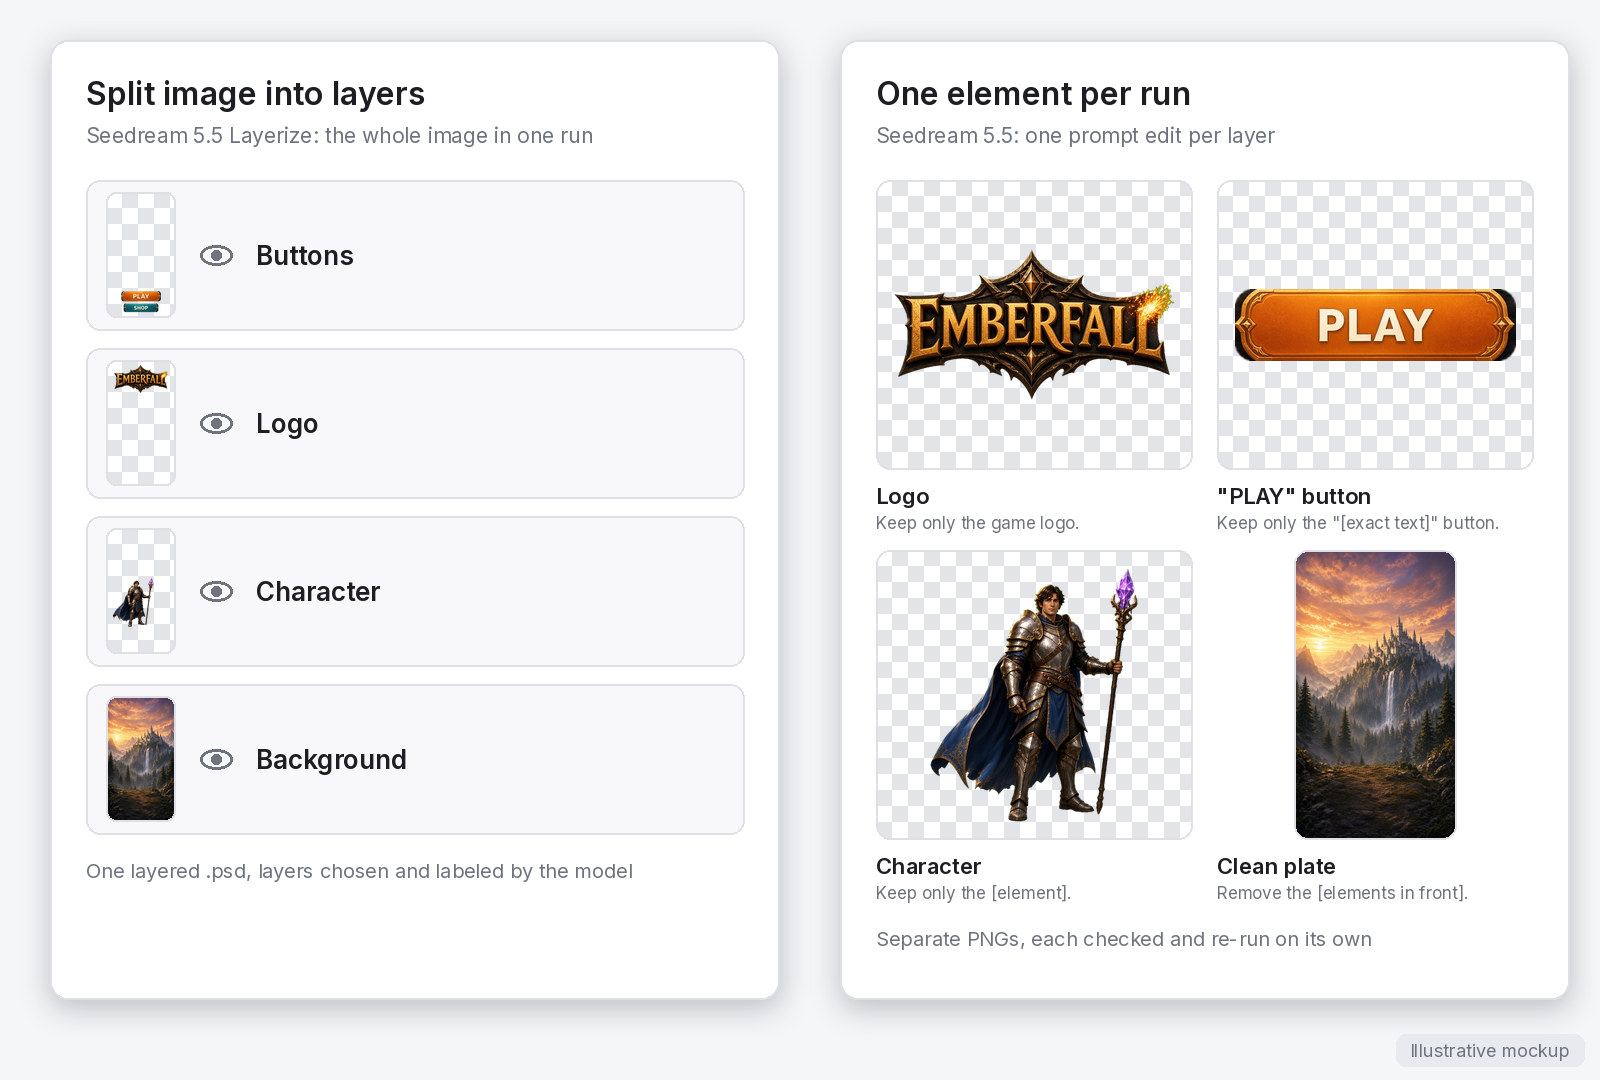
Left, one run of Split image into layers returns a layered file. Right, one Seedream 5.5 prompt edit per element returns separate images. Illustrative mockup.
Layer offers two methods. Most jobs start with the first and switch to the second for the layers that need more care.
One run: Split image into layers
Split image into layers in the viewer's Actions panel runs Seedream 5.5 Layerize on the whole image and returns a layered Photoshop (.psd) file. The model chooses and labels the layers, and you can name the elements you want in Describe what's in the image. Use it for broad cuts (subject, props, background) and for a fast first pass. The steps are in Split an image into layers.
One element per run: Seedream 5.5 prompt edits
Seedream 5.5 can return a true transparent background, so a prompt edit can pull out one element as its own image. You run it once per layer, which takes longer and gives you control over each part: what is in it, what gets completed behind it, and what the background layer becomes. Use it when a layer has to be production-ready, such as a button with legible text, a character part that will rotate in a rig, or a soft glow.
Choosing between them
A quick, editable stack of the whole image: Split image into layers.
A few elements that came out merged or incomplete in the split: re-run those elements one at a time with Seedream 5.5.
Text, semi-transparent effects or parts hidden behind something: one element per run.
Versions on Layer
Seedream 5.5 Layerize
Splits a finished image into a set of labeled layers in one run. The layer count is a setting, not prompt text, and the optional prompt names which elements to separate. It is the default model for Split image into layers.
Seedream 5.5
Generates and edits images from a prompt and can return a transparent background on its own. This guide's one-element-per-run method uses it.
Plan the layer list first
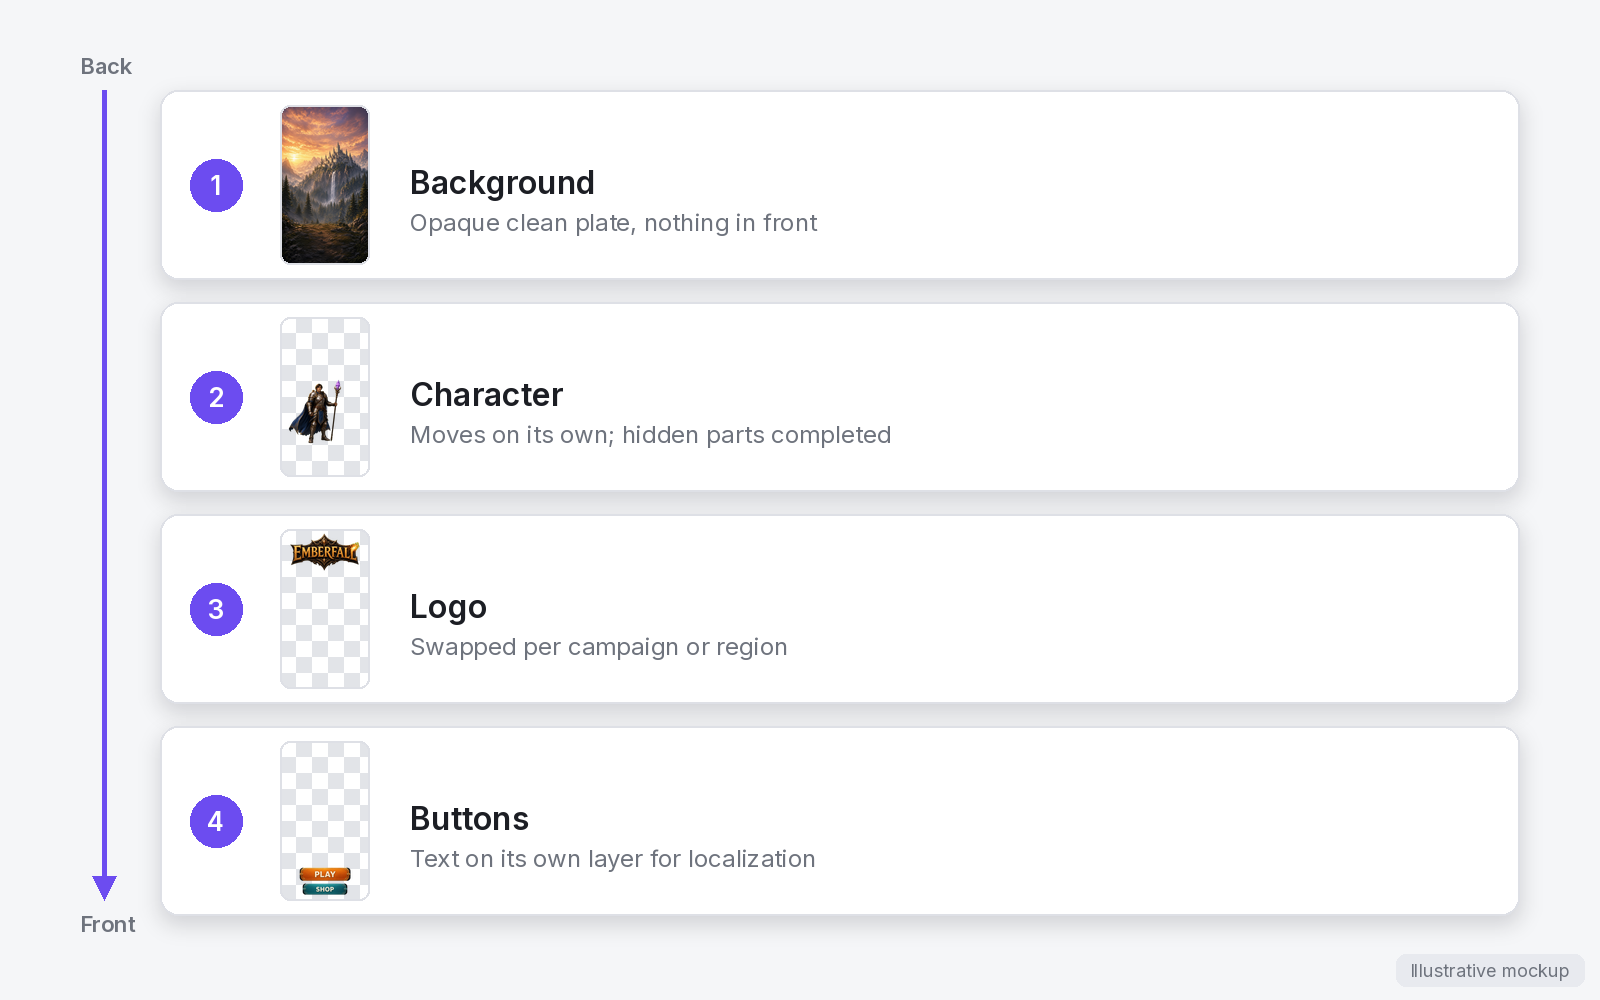
A layer list for a menu screen, written back to front with a note on how each layer is used. Illustrative mockup.
Before you run anything, write down the layers the finished file needs, in stacking order from back to front. Think about how each one will be used:
What moves or changes independently gets its own layer: a button, a logo, a character's arm, a foreground tree.
What always moves together can share a layer, which keeps the file lighter.
The background is one opaque layer with nothing in front of it.
Text and effects are separate layers, so they can be localized or animated.
A short list keeps the work predictable and tells you how many runs to budget for.
How to write the prompt
For one element per run, the prompt names the element, then holds its position, then sets the background:
Keep only the [element]. Keep it at exactly the same position and size as in the original, without re-centering. Transparent background.
Two things matter in this pattern:
One element per prompt. Name the single thing that belongs on this layer.
A position-keeping instruction. When the subject is isolated, the model may enlarge it or move it to the center. Asking it to keep the original position and size helps the layers stack back into the same composition.
For Split image into layers, list the elements instead, in plain words: logo, three menu buttons, character, background. To focus on one area, Seedream 5.5 Layerize also reads a box in the prompt, <bbox>left top right bottom</bbox>, on a 0 to 1000 grid across the image.
Make a clean background
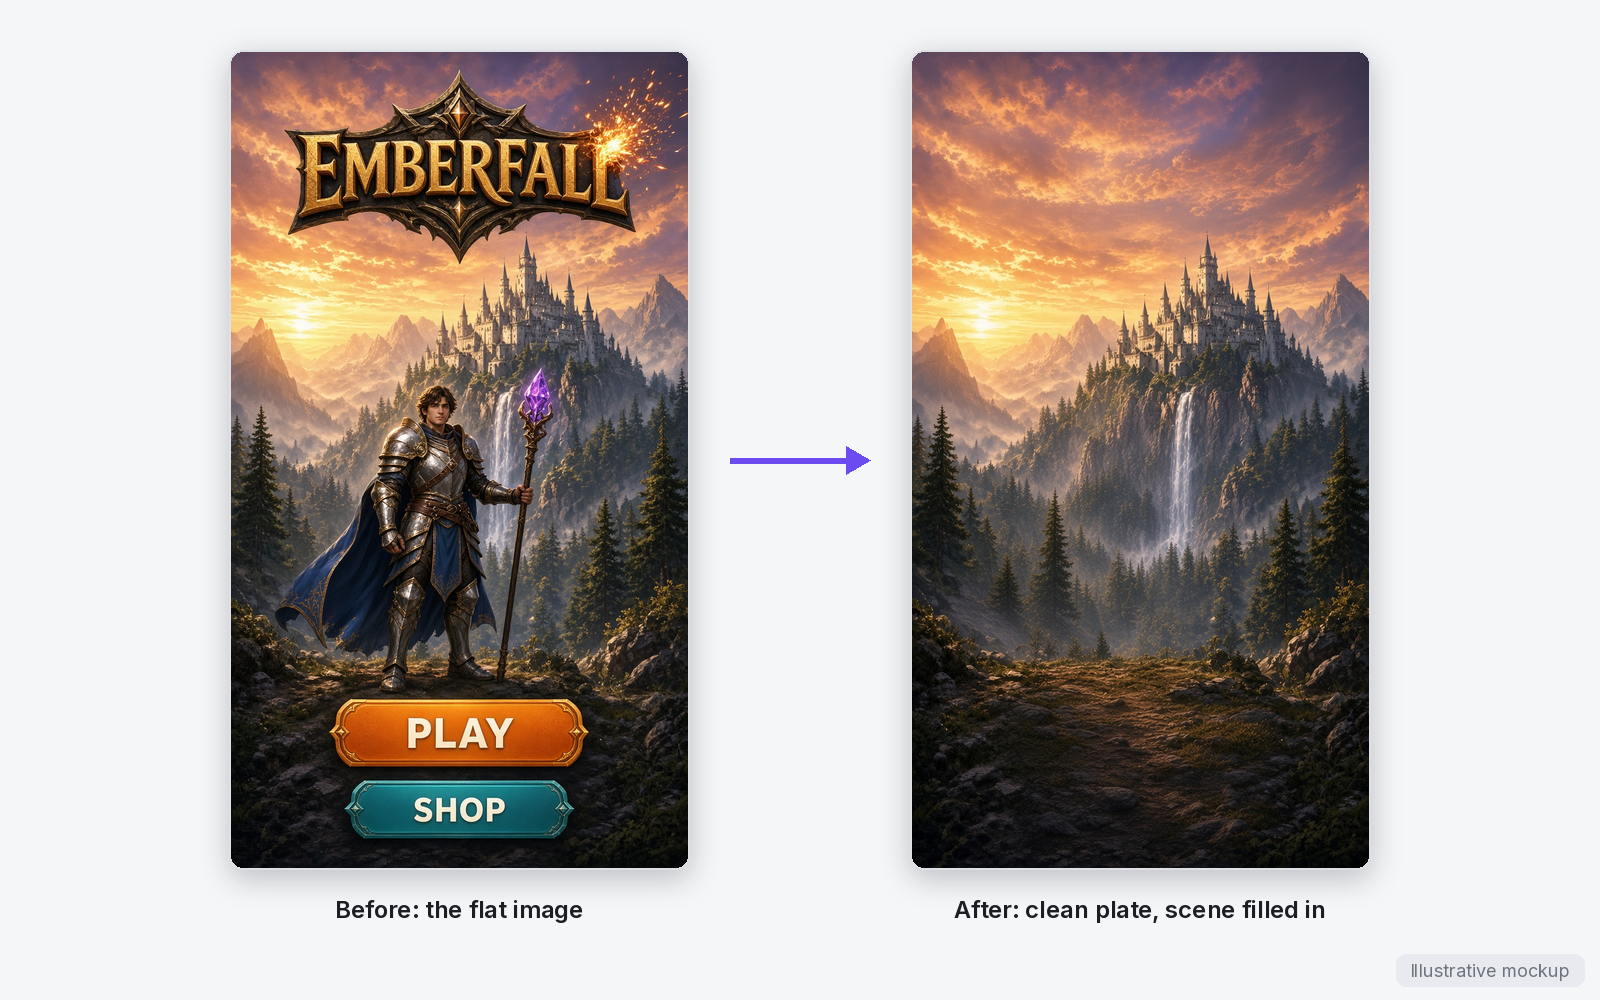
The flat image, and the clean plate with the logo, character and buttons removed and the scene filled in behind them. Illustrative mockup.
The background layer is the one place to ask for an opaque result. Ask the model to remove what sits in front and fill in what was behind it:
Remove the [elements in front]. Fill in the [background] behind them so the scene is complete. Opaque background.
The result is a clean plate you can reuse under other elements or extend for another aspect ratio.
Keep text legible
Put on-image text in double quotes, exactly as it appears, so the layer comes back with the same words and letter case:
Keep only the button with the text "[exact text]". Keep it at exactly the same position and size, without re-centering. Transparent background.
Keeping text on its own layer also makes localization a swap of one layer.
Complete hidden parts
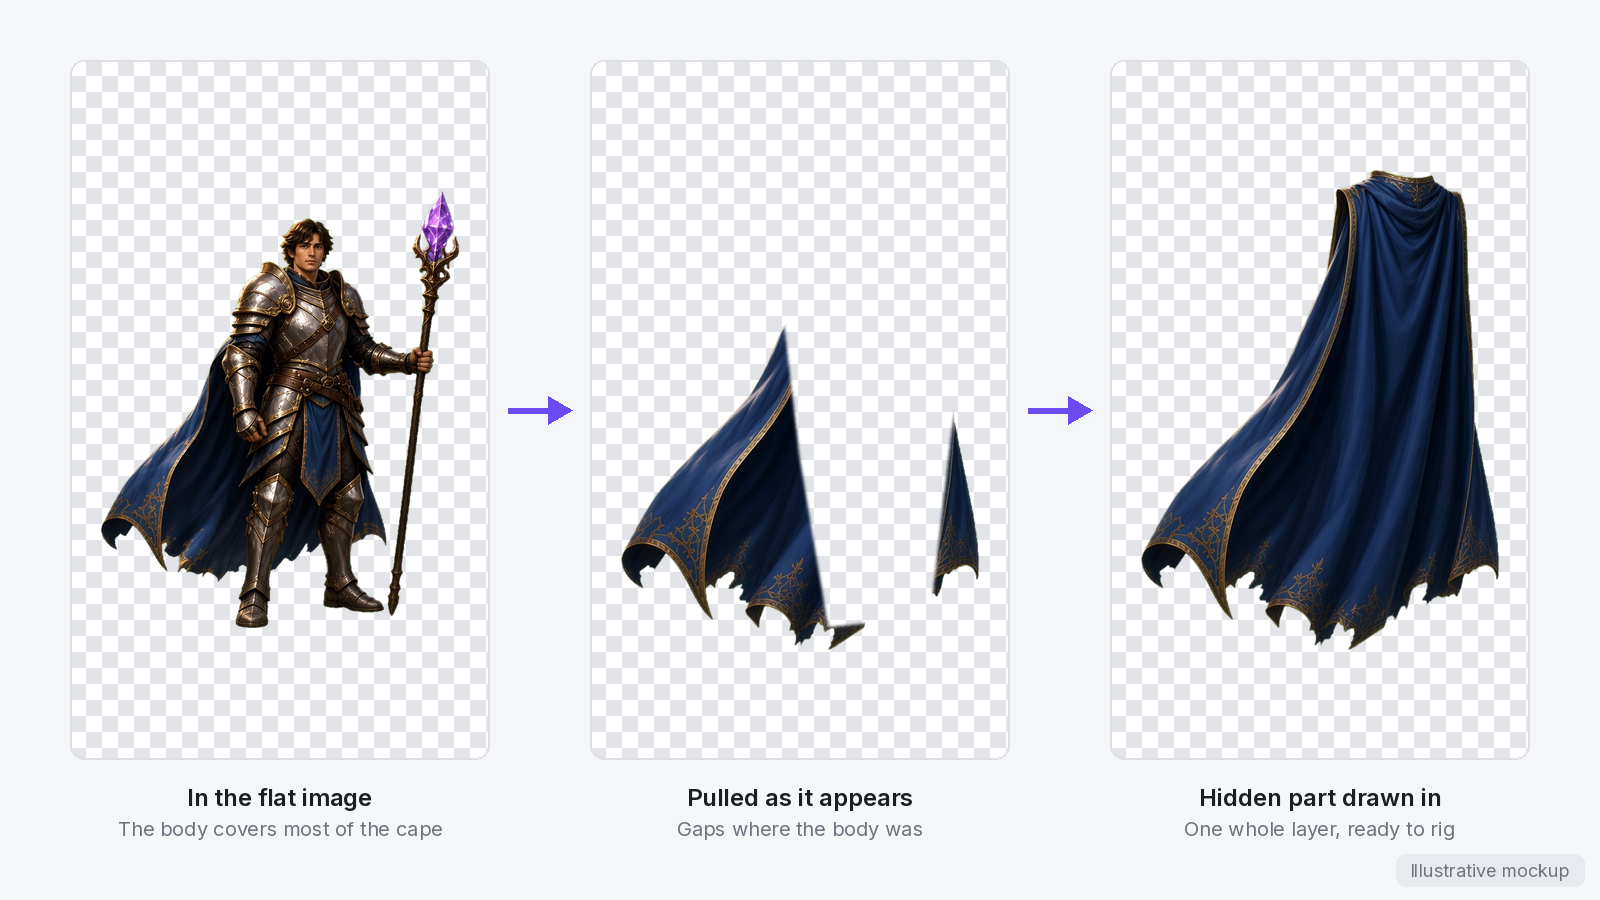
A cape that the body covers comes out with gaps. Asking for the hidden part returns the whole cape as one layer. Illustrative mockup.
Parts covered by something else are missing from the flat image. Ask for them by name and say where they are, so the model paints the part rather than copying a visible one:
Keep only the [element], and draw the part of it hidden behind the [covering element], at the [location].
For example: Keep only the knight's cape, and draw the part hidden behind his shoulder armor. Parts that are not visible at all are the hardest; expect to run them more than once. Asking for a whole figure can change its scale, so check its size against the original afterwards.
Separate effects
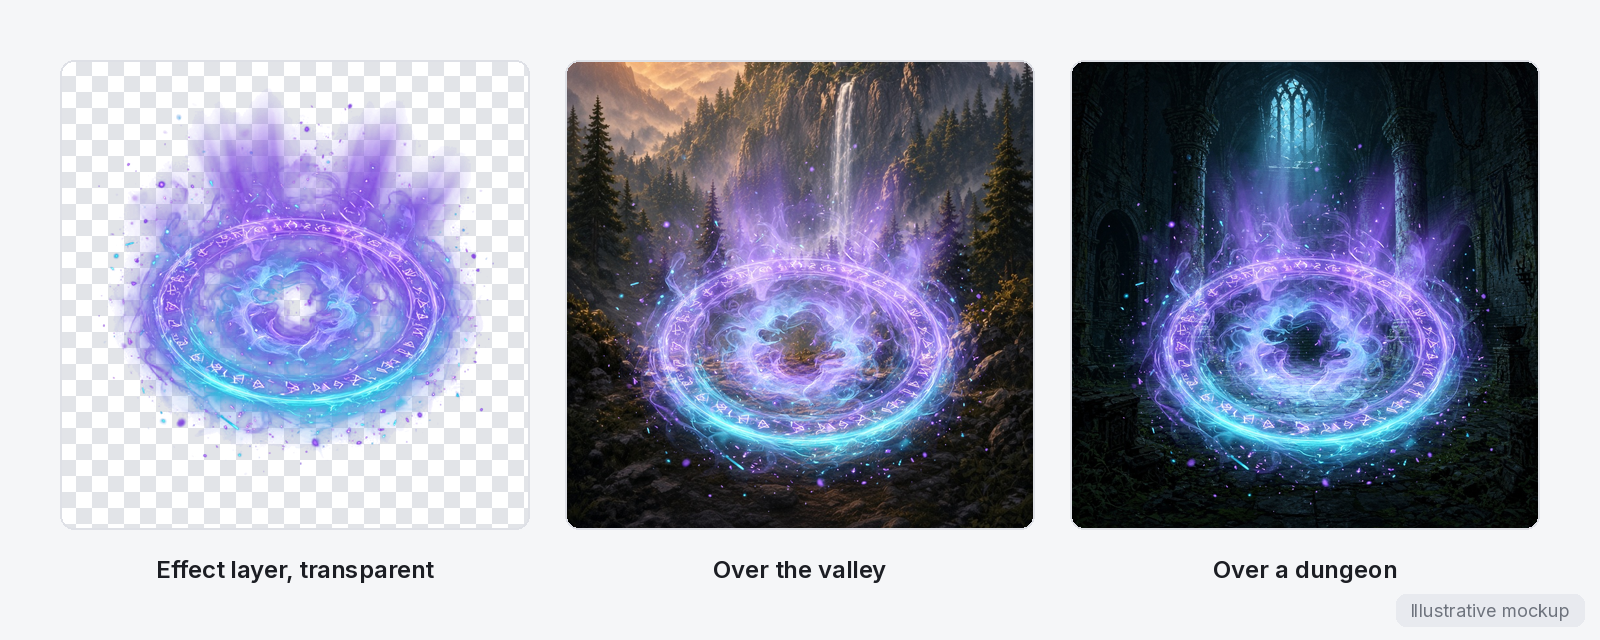
One effect layer with a transparent background, composited over two different backgrounds. Illustrative mockup.
Glows, magic, smoke, sparks and light beams work best as their own layers. With a transparent background, Seedream 5.5 can return them as semi-transparent light that composites over any backdrop:
Keep only the [spell effect] around the [element]. Keep it at exactly the same position and size, without re-centering. Transparent background.
Settings that matter
Both Seedream 5.5 and Seedream 5.5 Layerize are in the model menu on the prompt bar under the image. For one element per run, choose Seedream 5.5 and turn on Transparent background for every layer except the background. For a one-run split, choose Seedream 5.5 Layerize, which shows a Layers setting for how many layers to produce. The result keeps the shape of the source image.
Prompts to start from
A menu button
Keep only the "[exact text]" button. Keep it at exactly the same position and size, without re-centering. Transparent background.
A logo from marketing art
Keep only the game logo. Keep it at exactly the same position and size, without re-centering. Transparent background.
A foreground element in an environment
Keep only the foreground tree on the [location]. Keep it at exactly the same position and size, without re-centering. Transparent background.
A character part for animation
Keep only the character's [body part], and draw the part hidden behind the [covering element]. Keep it at exactly the same position and size, without re-centering. Transparent background.
A clean plate
Remove the characters, logo and text. Fill in the scene behind them. Opaque background.
Use it in Layer
Add the image to a session's board, then click View to open it full-size.
For a first pass, choose Split image into layers in the Actions panel, name the elements in Describe what's in the image, and click Split into layers.
For a layer that needs more care, select the original in the strip, click the model name on the prompt bar and choose Seedream 5.5.
In Describe the change you want, write the prompt for one element, then click Edit image.
Select the original again and repeat step 4 for each remaining layer.
Compare each layer with the original at full size, and run any that shifted again.
Click Download and stack the layers in your editor or engine, background first.
Check the stack
Before you hand the layers on, stack them back over the original and toggle each one. Look for layers that shifted or changed scale, edges with halos, holes where something used to be covered, and text that changed. In a split .psd, the eye icons in the Layers panel do this in the viewer, and Save a copy keeps a cleaned-up version.
Production tips
Reuse layers as a template. A full set of layers rebuilds the original. Swap one, such as the character or the headline, to make a variant without redrawing the rest.
Refit instead of redraw. A clean plate plus separate subject, logo and text layers let you rebuild landscape art in portrait or square formats.
Cut for the rig. For 2D animation, pull each moving part on its own layer and ask for the parts behind it to be completed, so joints rotate without gaps. See Rig a 2D character for Spine.
Animate from one set of layers. Effects, props and UI states on separate layers can be moved, faded or hidden in your engine to make several frames.
Batch it with a workflow. For a set of images, put the split or the per-element prompts in a workflow and add a quality gate so only layers that pass your checks go on. See Ship art through a quality gate.
Budget for re-runs. Each element is a run, and hidden parts may need more than one. See Creative Units for how runs are charged.
If something goes wrong
A layer is larger, smaller or centered. Check the prompt keeps the original position and size, and run it again. A whole figure that changed scale can be placed back by hand in your editor.
Two elements came out on one layer. In a split, name both in Describe what's in the image and run it again, or pull the one you need with a Seedream 5.5 prompt edit.
A hidden part repeats a visible one. Say where the hidden part is and what covers it, then run it again.
A layer lost its transparency. Turn on Transparent background and run it again, or use Remove an image's background on the result.
Learn more
Seedream 5.5 Layerize parameters (Layer API docs): layer count and the optional prompt for one-run splits
Seedream 5.5 parameters (Layer API docs): every setting the model accepts, including transparency